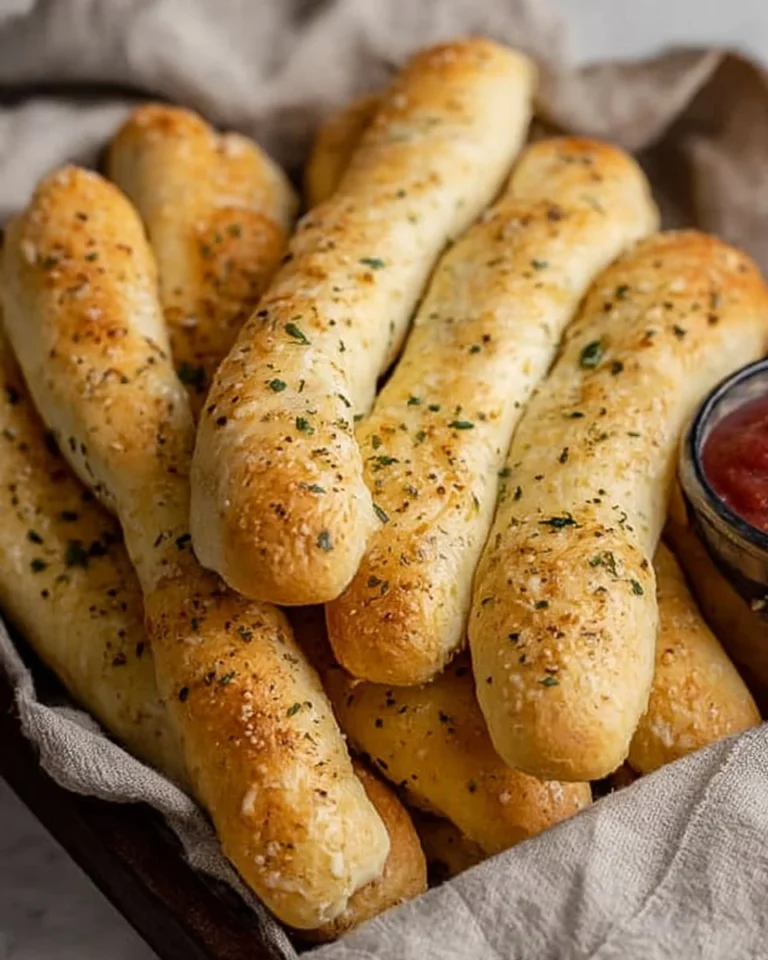
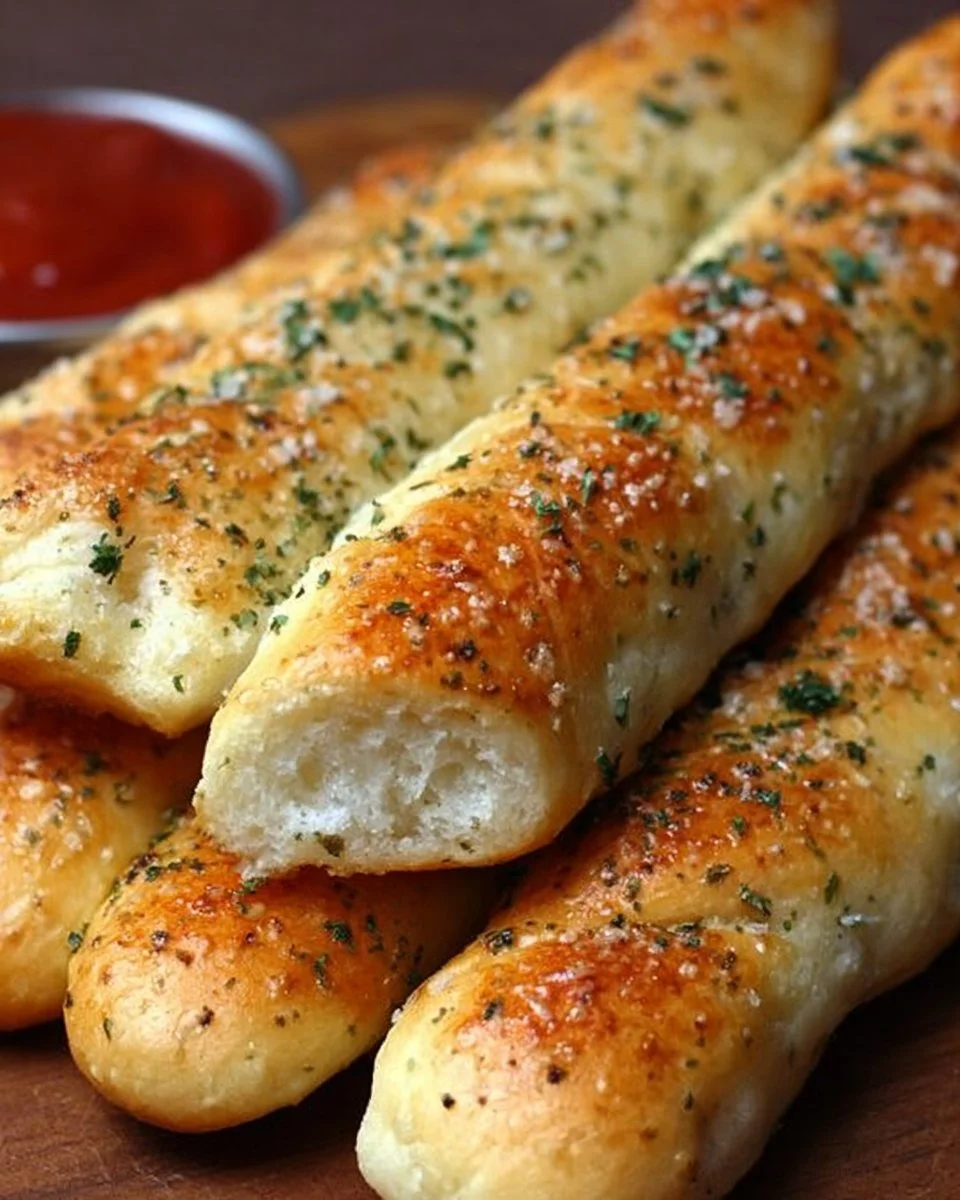
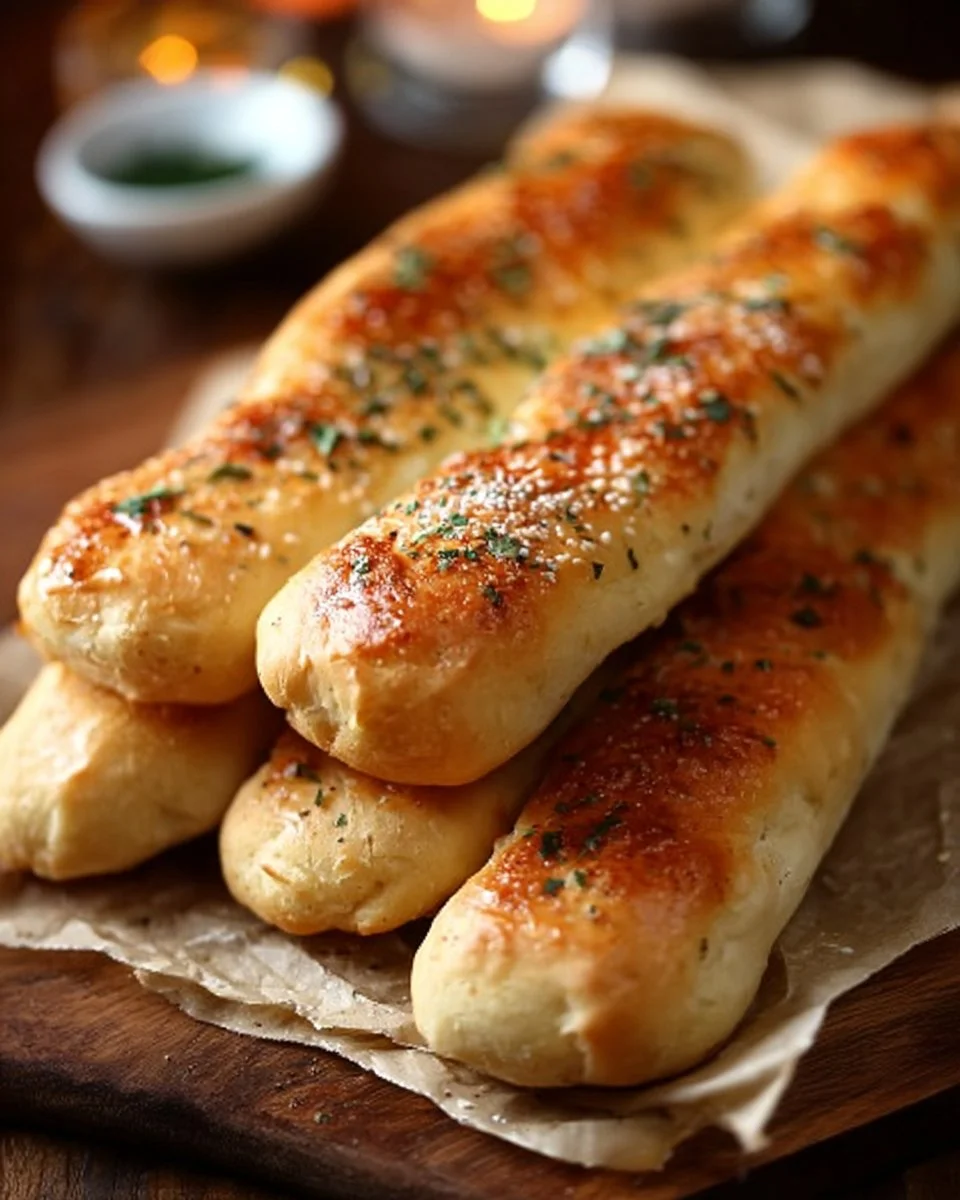
Olive Garden Breadsticks
Olive Garden breadsticks are more than just a side dish—they’re an experience! These soft, buttery, and slightly garlicky treats are often a reason to visit the beloved Italian restaurant. However, have you ever thought about recreating them in the comfort of your own kitchen? With a few basic ingredients, you can whip up a batch of these iconic breadsticks that pair perfectly with any meal or can even stand alone as a snack. Their delightful aroma and inviting texture make them special, turning any gathering into a cozy feast.
Reasons to Try It
There are countless reasons to make homemade Olive Garden breadsticks. First, they’re incredibly easy and quick to prepare, making them ideal for a weeknight dinner or a weekend family brunch. They’re budget-friendly and can be prepped with ingredients you likely already have in your pantry. Plus, there’s something about the aroma of freshly baked bread that just makes everyone feel at home.
Recipe reviews often rave about their soft texture and flavor. One happy home cook said, “These are the best breadsticks I’ve ever made! Everyone in my family kept asking for more!”
Step-by-step Overview
Making these beloved breadsticks is a straightforward process that anyone can tackle! Here’s a brief look at what’s involved:
- Combine Ingredients: Start with warm water, sugar, and yeast to activate the dough.
- Mix and Knead: Add in butter, salt, and flour to form a dough, then knead until smooth.
- Let it Rise: Allow the dough to rise until it’s doubled in size.
- Shape the Sticks: Divide the dough and roll it into stick shapes.
- Bake: Let them rise again before baking to golden perfection and brushing with garlic butter.
What You’ll Need
For these delicious breadsticks, gather the following ingredients:
- 4 cups all-purpose flour
- 1 tablespoon sugar
- 1 tablespoon salt
- 1 packet (2 1/4 teaspoons) active dry yeast
- 1 1/2 cups warm water
- 1/4 cup unsalted butter, melted
- 2 teaspoons garlic powder
- 1 tablespoon olive oil
- 1 teaspoon Italian seasoning
- Parmesan cheese for sprinkling (optional)
These ingredients come together to create a tasty dough that will yield breadsticks perfect for any occasion.
Directions to Follow
- In a large bowl, combine the warm water, sugar, and yeast. Let it sit for about 5 minutes until it becomes frothy.
- Gradually stir in the melted butter, salt, and flour until a dough forms.
- Knead the dough on a floured surface for about 5-7 minutes, or until it’s smooth and elastic.
- Place the dough in a greased bowl, cover it with a cloth, and let it rise for about 1 hour, or until it has doubled in size.
- Preheat the oven to 425°F (220°C).
- Once the dough has risen, punch it down and divide it into 12 equal pieces. Roll each piece into a long stick shape.
- Place the sticks on a greased baking sheet and allow them to rise for an additional 20 minutes.
- Bake for about 10-12 minutes until golden brown.
- In a small bowl, mix together melted butter, garlic powder, and Italian seasoning. Brush this mixture over the warm breadsticks and sprinkle with Parmesan cheese, if desired.
Best Ways to Enjoy It
These breadsticks are best served warm, straight from the oven! Pair them with marinara sauce for a delightful dipping experience, or alongside a hearty pasta dish or salad. For a more indulgent experience, consider serving them with a rich, creamy Alfredo sauce!
How to Store & Freeze
To keep your leftover breadsticks fresh, place them in an airtight container at room temperature for up to 2 days. If you’d like to store them longer, you can freeze them. Wrap each breadstick tightly in plastic wrap, then place them in a freezer-safe bag. They can be frozen for up to 3 months. When the craving strikes, simply reheat them in the oven at 350°F (175°C) for 10 minutes, and they’ll taste almost as good as fresh!
Helpful Cooking Tips
To ensure your breadsticks turn out perfect every time, here are a few tips:
- Use warm water (about 110°F) to activate the yeast effectively. If it’s too hot, you may kill the yeast.
- Knead the dough well; this helps develop gluten, giving the breadsticks their chewy texture.
- Don’t skimp on the garlic butter topping—it’s what brings that iconic flavor to life!
Creative Twists
Feeling adventurous? Here are some variations to consider:
- Cheesy Garlic Breadsticks: Incorporate shredded mozzarella cheese into the dough before baking.
- Herb-Infused: Mix in herbs like rosemary or basil to the dough for a fragrant twist.
- Sweet Version: Brush the baked sticks with melted butter and sprinkle with cinnamon sugar for a sweet treat.
Your Questions Answered
How long does it take to make these breadsticks?
Prepare them in about 2 hours, including rising time.Can I use instant yeast?
Yes, you can use instant yeast, but you may not need to let it sit with warm water first; just mix it with the dry ingredients.What should I serve with these breadsticks?
They pair excellently with soups, salads, pasta dishes, or as a standalone snack.Can these be made ahead of time?
Absolutely! You can prepare the dough, let it rise, shape the sticks, and refrigerate them overnight. Just allow them to come to room temperature before baking.
Conclusion
Homemade Olive Garden breadsticks are not only a great addition to family meals, but they also provide an interactive cooking experience that brings everyone together. Whether you’re serving them alongside marinara sauce or brushing them with garlic butter, they’re sure to be a hit on your dining table. If you’re eager to create a copycat version of this delicious bread, check out this copycat Olive Garden breadsticks recipe for detailed steps!